Nov 21, 2025
Low Voltage Cable Installation Best Practices: Ensuring Safety, Reliability & Compliance
Preparation for Installation
Understanding the Job Needs
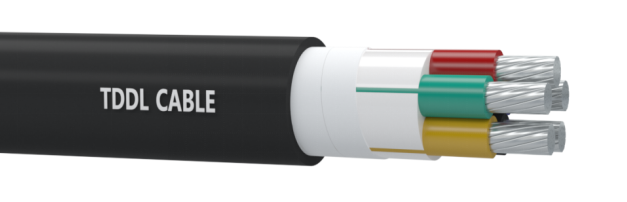
Before starting, check what the project needs. Figure out voltage and current levels. These decide cable choice and layout. Think about surroundings—moisture, heat changes, and chemicals. Pick cables that fit. Check standards and codes. Use national electrical rules and guides like IEC 60364 for low-voltage work. They set safety and setup methods. They keep things running right. The place matters—inside or outside. For example, “These power cables are used for electricity supply in low voltage installation systems. They are well adapted to underground use in industrial applications with an additional mechanical protection.” This shows cables must handle site stress.Gather Tools and Materials
Success starts with prep. Key tools are wire strippers, cutters, insulation testers, and continuity testers. Make sure each tool works and fits the voltage. Have all cable lengths and types ready first. For instance, “These cables can be fixed on cable trays, within conduits or fixed to walls.” This shows they work in many setups.Planning the Cable Route
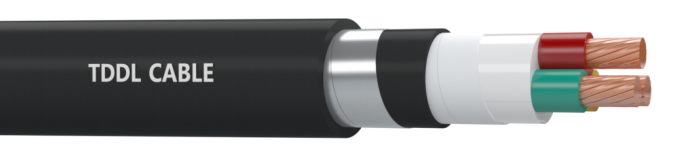
Map the path for safety and speed. Skip high-traffic spots or near hot gear or signal noise. Keep away from sharp edges and stress. For tough spots, pick strong cables like “They are suitable for laying Indoor, tunnel, cable trench, shaft or buried laying. The cable can withstand mechanical external forces and a certain tensile force.”Use of Personal Protective Equipment (PPE)
Tip 1: Always Wear PPE
Safety starts with gear. Wear insulated gloves for live-wire risks. Use goggles for cuts or strips. Steel-toed boots guard feet from drops and sharp bits.Tip 2: Use Insulated Tools
Even low voltage can shock if tools lack insulation. Pick VDE-rated tools for the voltage. This keeps users safe all through the job.Cable Handling and Storage
Proper Cable Storage
Store cables right to keep them good. Put them in cool, dry spots. Avoid sun and damp. Bad storage hurts insulation or rusts wires over time.Avoid Excessive Bending or Twisting
Makers give bend limits for each cable. Breaking them harms insulation or strains wires. Handle gently in moving and laying. This stops hidden flaws that hurt the system later.Environmental Considerations
Assessing the Installation Environment
The area affects cable life. For wet or chemical spots, use protected cables. For example, “These cables can be laying indoor, tunnel and underground. Able to bear external mechanical force, but unable to bear large pulling force.” This stresses picking the right type for risks.Consider Temperature Fluctuations
Big heat swings make materials expand and shrink. This leads to early failure. Choose cables rated for the site’s temperature range. This keeps performance steady.Installation Best Practices
Use Proper Installation Techniques
Do not yank cables or force tight bends. Stress damages insulation and shortens wire life. Use rollers or lube for long pulls. Add trays, brackets, and clamps often. This stops sagging or strain at joints.Avoid Overloading Cables
Each cable has a current limit. Going over heats it or starts fires. Calculate loads right before picking sizes. “Able to bear external mechanical force, but unable to bear large pulling force.” This shows some cables take pressure but not hard pulls.Labeling and Identification
Mark cables clearly. This helps techs spot circuits fast for fixes or adds. Include circuit number, voltage, start/end points, and install date. Good marks cut mistakes in fixes. They lower downtime in checks or crises.Post-Installation Checks
Inspect Connections
After setup, check all ends. Make sure they are tight and covered. Loose spots cause sparks or drops that hurt performance. Look for damage on the path or joints. Fix anything that risks safety.Testing the System
Test fully before power-on. Use insulation testers for shorts between wires or to ground. Run continuity checks. They prove each wire runs unbroken from start to end. These steps confirm the system is sound before use.Documenting the Installation
Keep good records for later. Include path drawings, test numbers, and notes on changes from site issues. Records ease future work. They prove rule-following in audits.